Baking
Menu
Here are my favorite recipes, click any link to check it out!
Only a handful of ingredients and there's no need to worry about raw eggs for this easy mousse
A new tradition is born during Christmas! These are so good even for someone like me who doesn't obsess over cookies
My signature dish as it's my favorite dessert! Explore different flavors after making a simple vanilla ice cream base: Chocolate, Berries/Stone Fruit, Banana, Mango, Matcha/Green Tea, and Coconut!
A special cake that's close to my heart with a healthier substitute of using olive oil instead of butter
Another tradition is born - whether you're single or mingling, these creamy truffles will give you chocolate dreams!
A St. Louis favorite conjured up from a kitchen accident. This is the cake that makes me melt (pun-intended haha). It's a cake I can never resist when eating out in a restaurant. Serve with whipped cream and berries for the perfect dessert.
Famous in many Asian bakeries and rumors of being the cake of "frustration", this cake is actually surprisingly easy to make! ^^
Bon Appétit!
Happy Baking!
Chiffon Cake
If there’s a cake that I could eat every day, it would be this cake: it has the most tender crumb, light as a cloud, and served with airy whipped cream (and fresh fruit) – this is a dreamy cake!
Popular in many Asian bakeries, it has a stormy reputation. This cake is expensive and has an alluring texture, so it’s translated to “Chi (first tone) feng dan gao,” meaning “light” and “soft.” Yet, rumors said constant failed attempts changed the accent of the cake’s name to “Chi (fourth tone) feng dan gao”, i.e., cake of “anger leading to insanity” or “frustration.” (Unrelated fact: My mom and I had more frustrations trying to translate this rumor, haha!) To add to the drama, I found out this cake was actually not invented by an Asian.
(Shhh – I’ll get in trouble for that, hats off to Harry Baker.)
Anyway, after making my first successful cake (which was chocolate), I tried my luck on this cake. Much research went into finding the perfect recipe. I then compiled them together, and the result? The perfect, foolproof chiffon – that you don’t need to kill yourself over.
I have to credit Xiao Gao Jie for her lovely video, which cleared my way to success. Please check her out. She did a really good job explaining the science/logic in every step that I am about to do here. Besides chiffon, her other recipes are also beautiful and delicious. I am certainly planning to try out more. (Bonus: You’ll get free Chinese lessons in each video with English subtitles!)
Are you ready? Trust me. I’ve made this many times when I wanted cake; this cake has never disappointed me. You’ll scoff at every fancy Asian bakery after this.
Ingredients (for Cake)
100 grams of cake flour (All-purpose is fine too for this recipe, but cake flour brings a softer texture!)
75 grams of oil (Vegetable or olive oil is good)
75 grams of milk (I prefer whole milk, but any milk would do)
1/8 teaspoon of salt
1 teaspoon of baking powder
Vanilla
75 grams of sugar
5 eggs, separated
A splash of lemon juice (Xiao Gao Jie uses vinegar, but I prefer citrus.
Ingredients (For Whipped Cream)
1 cup of heavy cream
Sugar to taste, I recommend powdered sugar
Vanilla to taste
Directions
Preheat your oven to 330°F
Sift the cake flour and salt into a bowl
Add the oil and whisk together (Oil first is an important step, don’t skip this. Xiao Gao Jie explained it in her video!)
Mix in the milk, egg yolks, and vanilla
When it’s almost mixed, add baking powder (The order is important.)
Whip egg whites, lemon juice, and sugar (In three stages - The explanation of this is very good in the video!) till medium peaks and glossy
Next, fold in the egg whites in three stages till just combined
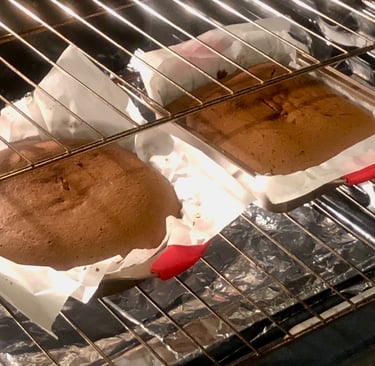
Pour directly into a pan (DO NOT grease the pan, you want the chiffon to cling to the pan. A slippery wall won’t help. A tube pan works best. I do bake mine in a normal pan, but the cake won't get as tall or "sink" or "cave in on itself" as much. I get more of a "mountain" shape...but still delicious!)
Tap the air bubbles out and cover with foil
Bake for 20 minutes
Turn down oven to 310°F
Remove the foil
Bake for another 20 minutes (Though I check early to make sure)
Cool the cake upside down (Yup. For me, I take two cups and place the cake on top of that.)
Serve as is or make whipped cream!
When cooled, whip heavy cream, sugar, and vanilla together to make whipped cream
Top generously or layer the cake, and if desired, top with fruit(s)
Enjoy!
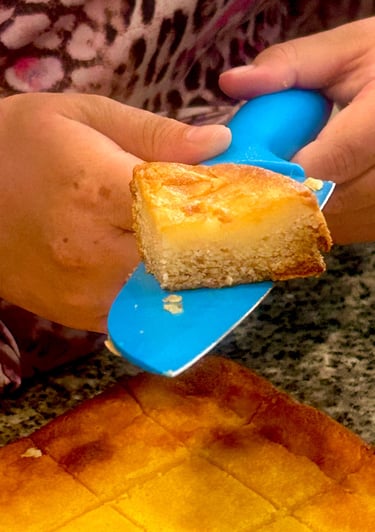
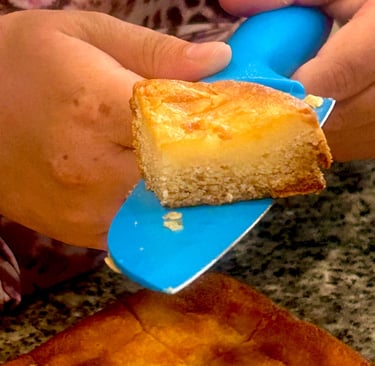
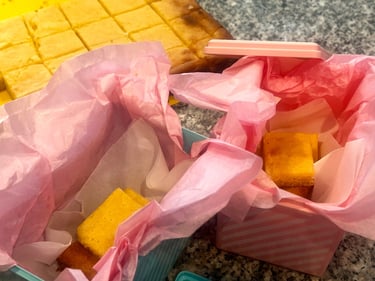
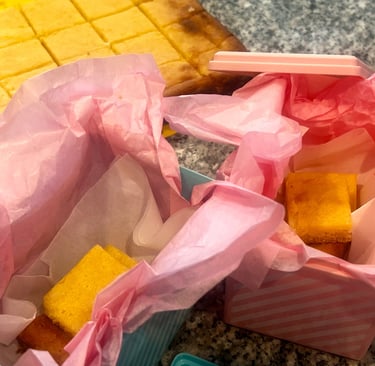
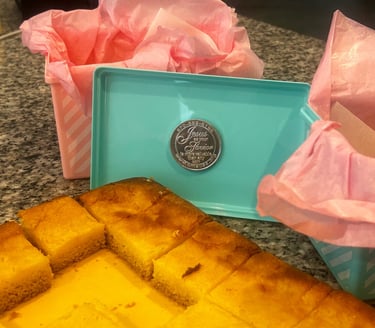
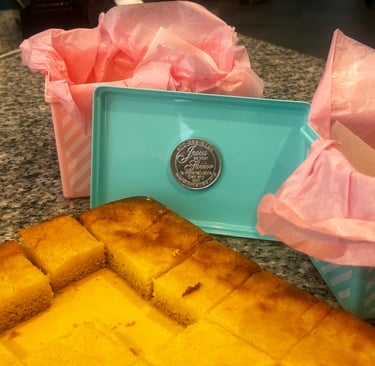
Butter Cake
If there's any cake that makes me melt (pun-intended), it's butter cake. Served with whipped cream and juicy strawberries, it's my favorite cake ever. Yes, even more than my chocolate cake or chiffon cake. (I will hyperlink this recipe when the time comes! Stay tuned!)
When I first had butter cake, I expected the whole thing to taste like pure butter. Or as my professor joked, "Butter cake!? Is that like you put a slab of butter on top?" (He's hilarious.) The truth is: this cake is magical.
What you'll expect is a buttery, soft base of a cake with the most delicious filling on top. The filling is not only buttery, but creamy and tangy, thanks to the addition of cream cheese. :) (However still perfectly sweet) The end combination is a bite of buttery gorgeousness melt in your mouth.
What I also love about this recipe is: it's a reminder that mistakes can bring masterpieces. This unique creation is said to be created in St. Louis around the Great Depression through an accident during making a coffee cake. Who would know since then, this cake has melt everyone's heart? :)
Ingredients
Crust
1 box of cake mix (Flavor of your choice but personally, I feel simple vanilla pairs with butter the best! Most recipes also recommend yellow cake mix. Also, you caught me. This is a recipe that is sadly not from scratch, but I am planning to try an all-from-scratch butter cake this summer. Stay tuned!)
1 stick of butter, cut into small pieces, room temperature
1 egg, room temperature
Vanilla to taste (optional)
1/8 teaspoon of salt (optional)
Filling
1 stick of butter, cut into chunks, room temperature
8 ounces of cream cheese, room temperature
2 eggs, room temperature
Powdered sugar to taste (Yup. To taste. I found many recipes include an entire box of powdered sugar. I'll be the first to tell you that you don't need to do that. After talking/arguing with my mom, we made the happy compromise on doing half a bag. That's already plenty. I recommend trying this first and once it's sweet enough for you, add the eggs.)
Vanilla to taste (optional)
1/8 teaspoon of salt (optional)
Directions
For this recipe, I recommend you baking this cake in a 9 x 13 inch pan but you can also do it smaller/bigger. What you want to keep in mind is that you want to spread the crust evenly for even cooking.
You also might have noticed everything is at room temperature! This ensures easy creaming of the ingredients. I recommend this so you don't have to worry about clumps that won't get smooth. Depending on your climate, the butter might get softer sooner or later than you expect so be mindful when you take it out of the fridge. Mine gets soft in minutes.
Preheat your oven to 350 degrees
Mix together the crust ingredients (cake mix, butter, egg) and if you'd like, add vanilla and salt
Spread this dough into your greased pan as evenly as possible (I recommend placing "balls" of dough on your pan and flattening those "balls" out so it's even all the way through without running out of dough.)
Then, in a separate bowl, whisk together (I use the electric mixer for this) the cream cheese till fluffy
Add eggs (one at a time) until it gets smooth
Add vanilla and salt if you desire
Then add softened butter and whip till smooth and creamy
Add powdered sugar to your taste, and make sure there are no lumps at the end
Pour over the crust, spreading it across the whole pan
Bake for 40-45 minutes till a toothpick comes out clean
However, if your oven is fast like mine, I would check at 30 minutes and lower the heat to 300 for 5 more minutes before allowing it to cool
Allow it to cool and enjoy! ^^
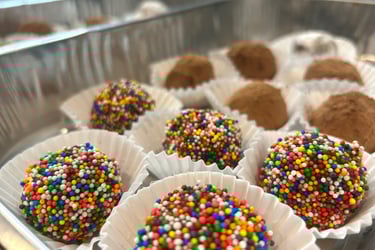
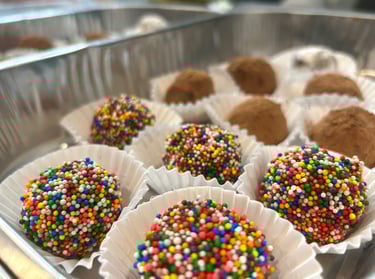
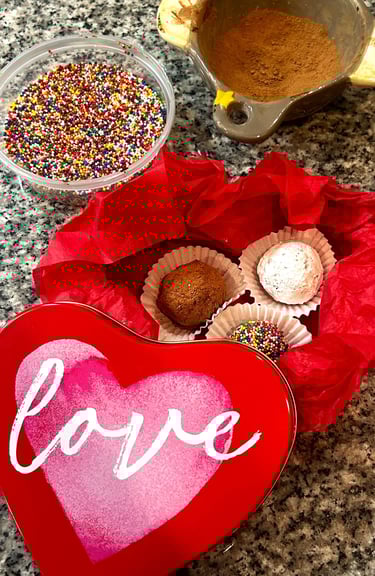
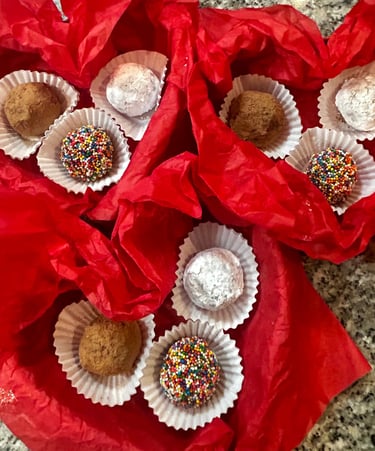
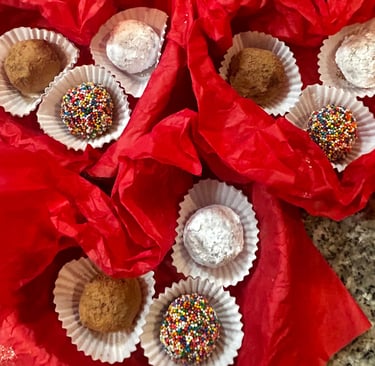
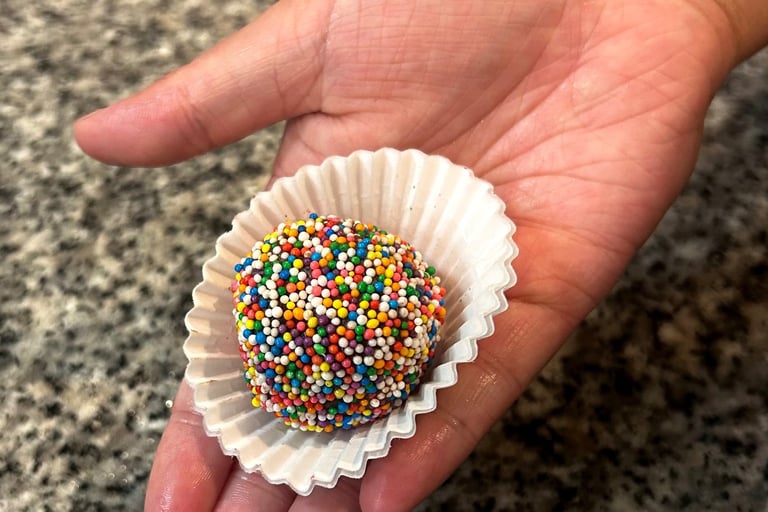
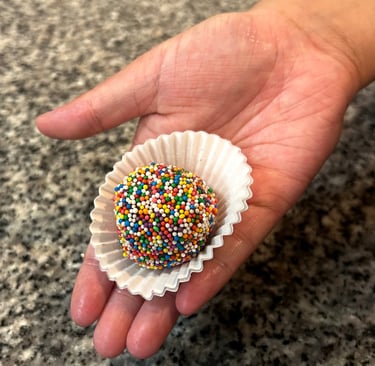
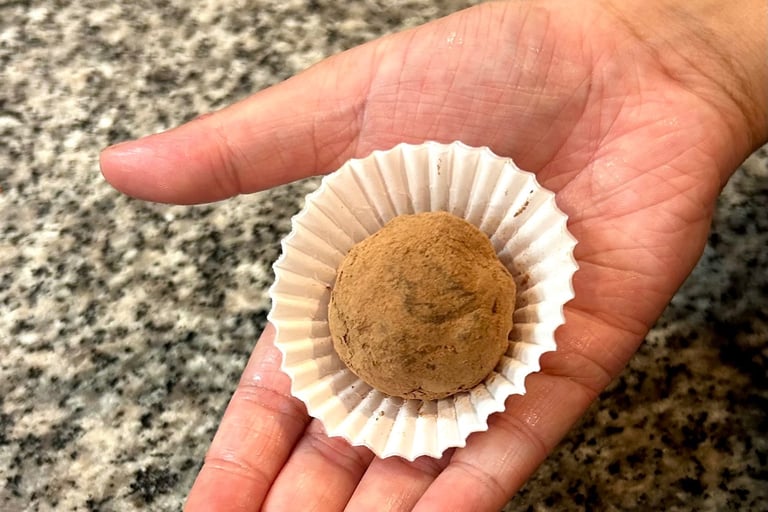
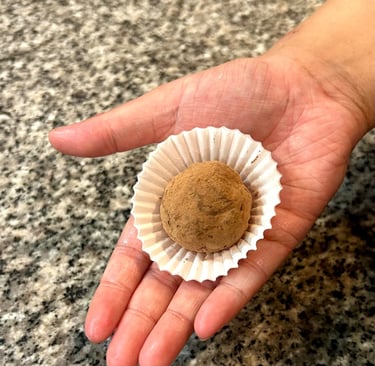
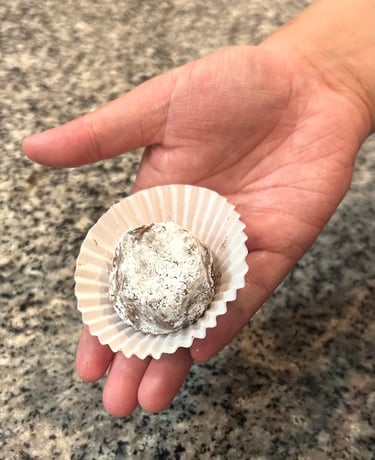
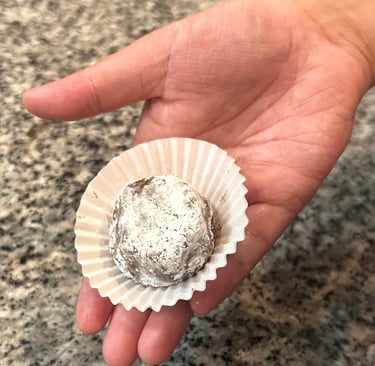
Chocolate Truffles
I often joke with my mom that once you learn how things are made at home, it ruins your life. Newsflash - Chocolate truffles that cost over $20 are simply melted chocolate shaped into balls. Whether it's a wonder or a waste, I'll leave you all to make the decision for yourselves. Whatever the case may be, these are truly delicious! ^^ Another tradition has started just like for my chocolate chip cookies, let's give cheers to Valentine's Day! Whether it's for a special someone, your professors, your family, your friends, or even for yourself - these will give you chocolate dreams. :D (They're that creamy.) Everyone will think these came from the shops! They're that good!
Oh, and on that note - my date absolutely enjoyed these! ^^ Who is my date? My mother! (Yup. I'm single and enjoying life! ^^)
Ingredients
300 grams of chocolate (I found the perfect ratio to be 180 grams of Hershey's Special Dark (Mildly Sweet) Chocolate and 120 grams of Hershey's Milk Chocolate!)
2/3 cup of heavy cream
1 tablespoon of unsalted butter
1 tablespoon of unsweetened cocoa powder (The secret ingredient! I find the bitterness/saltiness of the cocoa powder brings out the true chocolate taste in recipes. Also, cocoa powder paired with the salt also balances the sweetness of chocolate!)
1/8 teaspoon of salt
Vanilla
Directions
Chop your chocolate in small pieces to ensure the chocolate melts faster and easier (The smaller you cut your chocolate, the faster it'll melt and the smoother your truffles will be. Although, I found simply breaking them each square in half is enough.)
Heat your heavy cream, butter, salt, and cocoa powder in a small pan till piping hot and the cocoa powder has dissolved into the cream (Be careful not to burn the cream!)
Pour the hot cream over chocolate and quickly stir into completely smooth (Do not be alarmed if it seems lumpy at first, keep going at it - it will come together eventually!)
Place in fridge and allow mixture to firm up
Once firm, scoop teaspoon sized amounts unto a tray/pan (Do not worry about rolling into balls at this stage, the mixture is still too soft.)
Place in fridge again to allow chocolate balls to firm up
Once firm, roll into balls and dip into your desired toppings (I suggest cocoa powder and sprinkles. I did do powdered sugar too but personally, I find this one too sweet and the ficklest. You have to coat them many times or they end up looking...moldy, haha! Also, pro-tip, find small sprinkles as they stick the best!)
Store in fridge until ready to serve/eat!
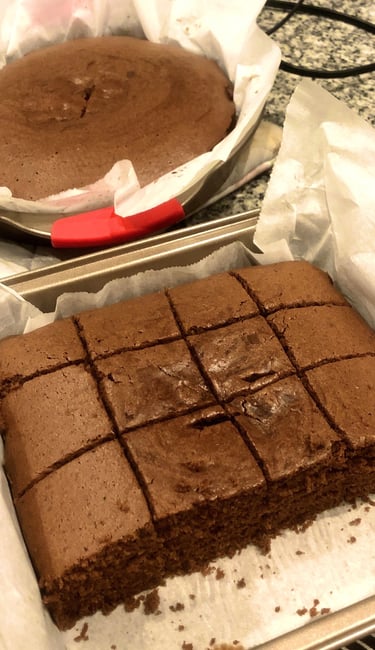
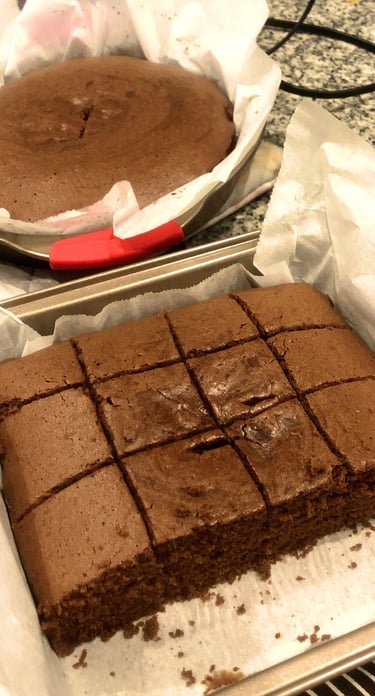
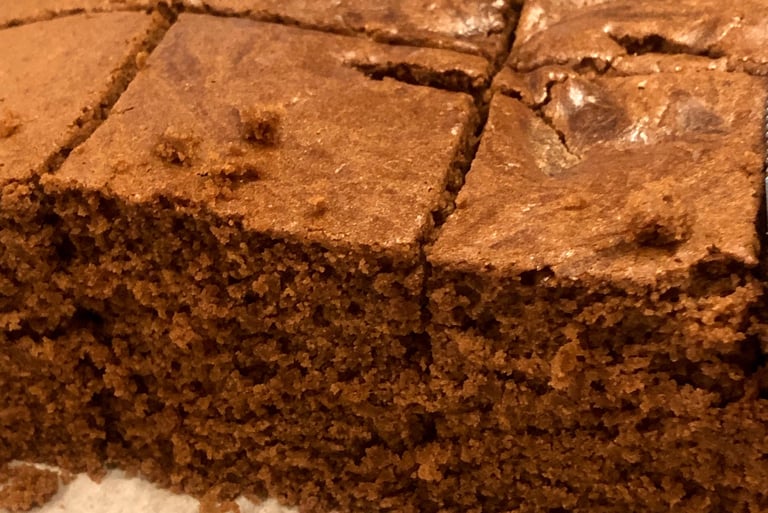
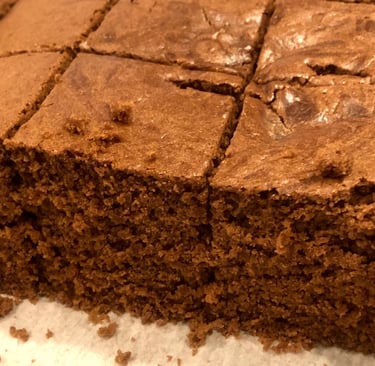
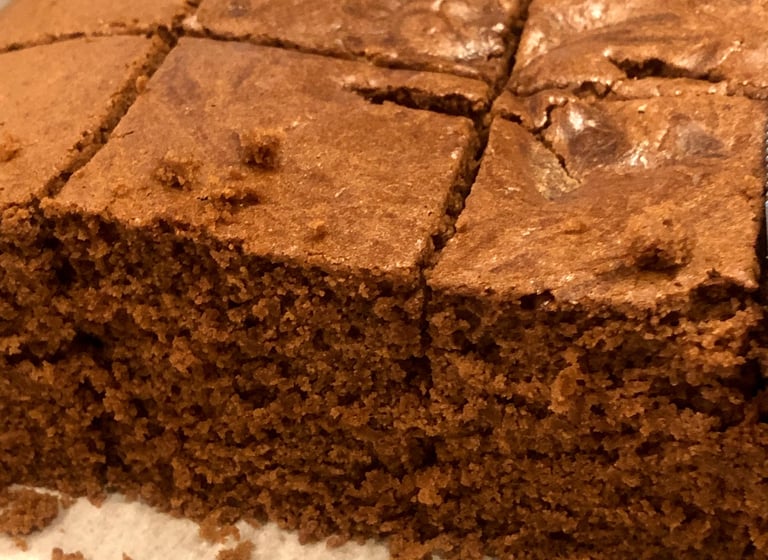
Chocolate Cake
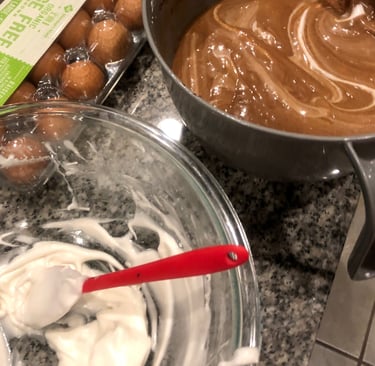
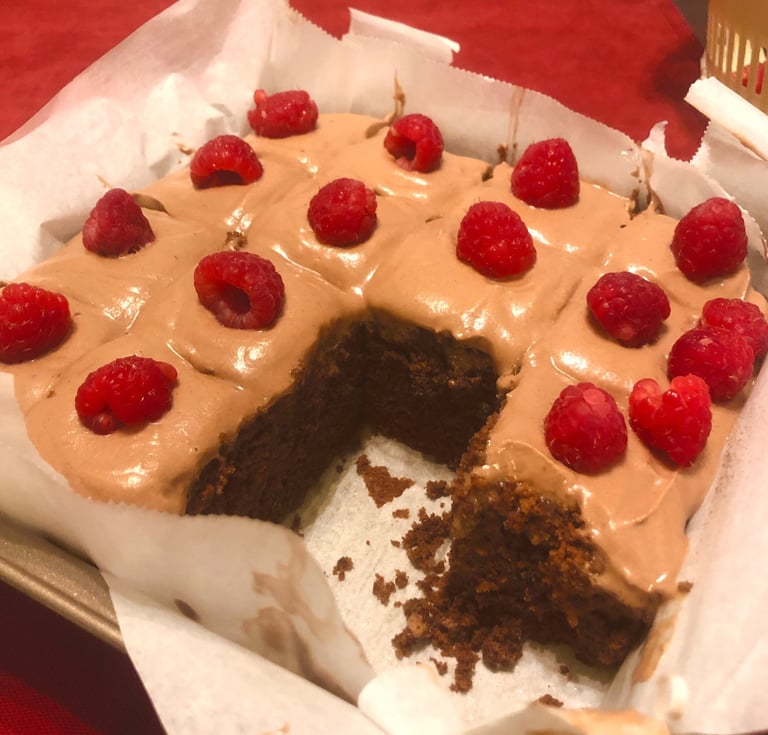
I’ve been waiting so long to post this cake recipe as it holds a special place in my heart. This cake was the start to my whole baking journey after series of failed attempts. After rubbery cupcakes and greasy cookies (don’t ask me how), this recipe changed everything. The first time I ever made this was around my mom’s birthday. I knew my failed attempts in the past so I asked my friend Cailyn desperately for a recipe with pantry staples. My mom and I are very close so it had to be special. The recipe was life-changing! I have modified the recipe since then by making more and more goodies but this is definitely now my go-to recipe. Cailyn, I thank you so much. I have made this recipe so many times that I made one for my art tutor topped with a chocolate glaze. Later, when my friend Estrella/Star graduated, this was my graduation gift. :”) We served this with my Cheat Chocolate Mousse and raspberries. My version of this cake isn’t very sweet but that means you can top with as much mousse as you want without feeling awful! ^^
Ingredients
Chocolate “Potion”
1 cup of water
¼ cup of coffee (You won’t taste this but it accentuates the chocolate flavor!)
¼ cup of milk (To combat the bitterness of the coffee! If you want this cake to be dairy free, you may replace this with another ¼ cup of water!)
1 tablespoon of honey
¾ cup of cocoa powder
Vanilla
Dry Ingredients
2 ¾ cups of flour (330 grams)
1 teaspoon of salt
Keep Aside for Later – 6 ½ teaspoons of baking powder
Wet Ingredients
5 egg yolks (If the yolks are small, I add one more just in case. Keep the whites but leave aside for later.)
½ a cup of sugar (Measure another ½ as that will go with the whites later but don’t add them together yet!)
¾ cups of olive oil (We’re not using butter like the original recipe; personally, I feel that oil makes cakes so much moister than butter.)
Egg Whites
Remaining 5 or 6 egg whites
Remaining ½ a cup of sugar
1 teaspoon of lemon juice or vinegar or cream of tartar
Topping options will be given below! ^^
Directions
In a small pot, prepare the wet ingredients for your chocolate potion (Water, coffee, milk) and honey
While it is warming up, measure your cocoa powder into a medium bowl
Once the wet ingredients are hot, carefully pour into the bowl with your cocoa powder and vanilla! Mix till combined and set aside to cool for later
In a separate bowl, mix together your flour and salt and set aside for later (If you have time and desire, you may sift your flour and salt for a lighter cake! ^^)
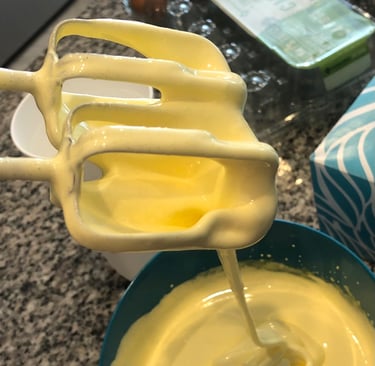
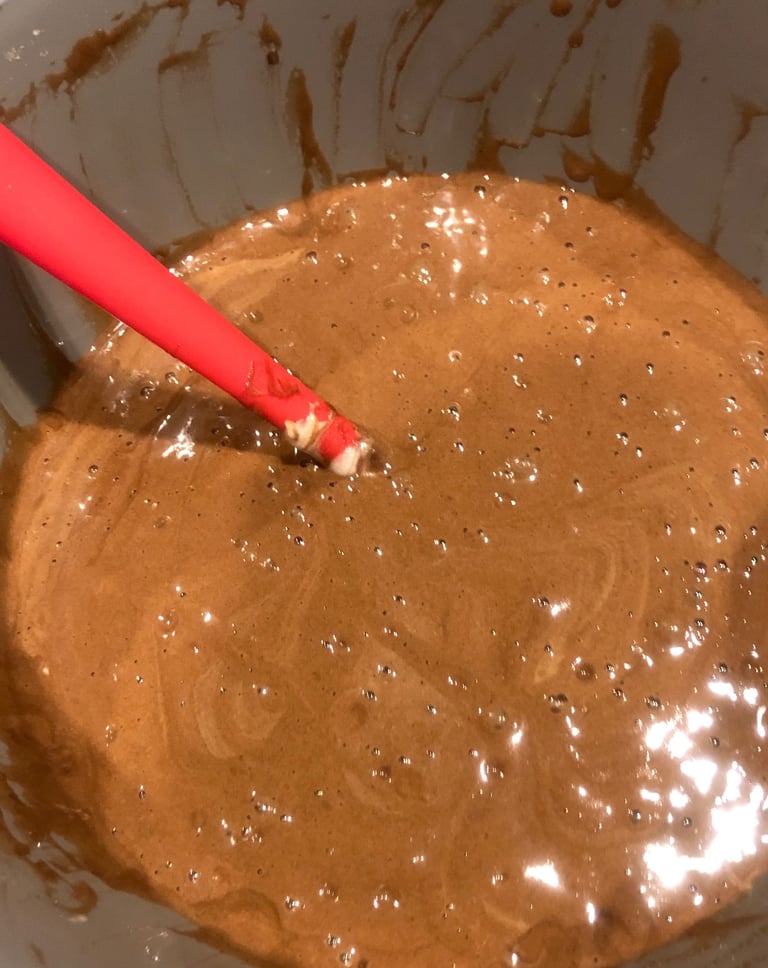
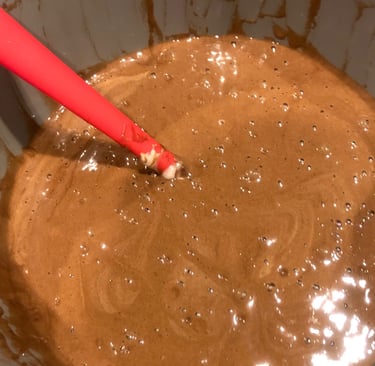
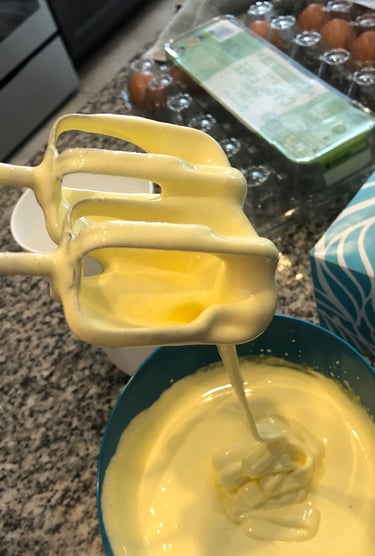
This is the tricky part of the recipe (Be patient as this step could take about an hour or more. This is my rendition of creaming butter! Instead of creaming butter, we are “creaming (whipping)” our egg yolks with our sugar.) – Preferably with a stand mixer with the whisk attachment, beat the egg yolks with the sugar (a little at a time) until it becomes a homogenous light-yellow mixture like mayonnaise! (Depending on your stand mixture, you may need to scrap the edges and bottom of your bowl while you do so!)
Now, a little at a time, pour the oil into the egg yolks until it comes into a homogenous, glossy, light-yellow mixture becoming more so like mayonnaise! You shouldn’t see any oil seeping out of the egg yolks as it should be completely mixed through. Be sure to scrap the edges and bottom of your bowl as you go (You’ll be surprised a lot of unmixed egg yolks like to hide)
Here's a picture from my ice cream recipe. The end result of beating the sugar and oil will be very similar. Keep in mind it's with a hand mixer not a stand mixer. For this cake recipe, I highly recommend you use a stand mixer!

Add about 1/3 of your dry ingredients (flour and salt) and fold into your egg mixture, do not mix completely
Add about ½ of your now cooled chocolate potion and fold into your egg mixture, do not mix completely
Add the second 1/3 of your dry ingredients and fold, do not mix completely
Add the remaining amount of cooled chocolate potion and fold, do not mix completely
Add the remaining 1/3 of dry ingredients and your baking powder that you reserved at the end. Fold together till just combined, don’t be scared if the batter is super thick! We’ll get to that soon!
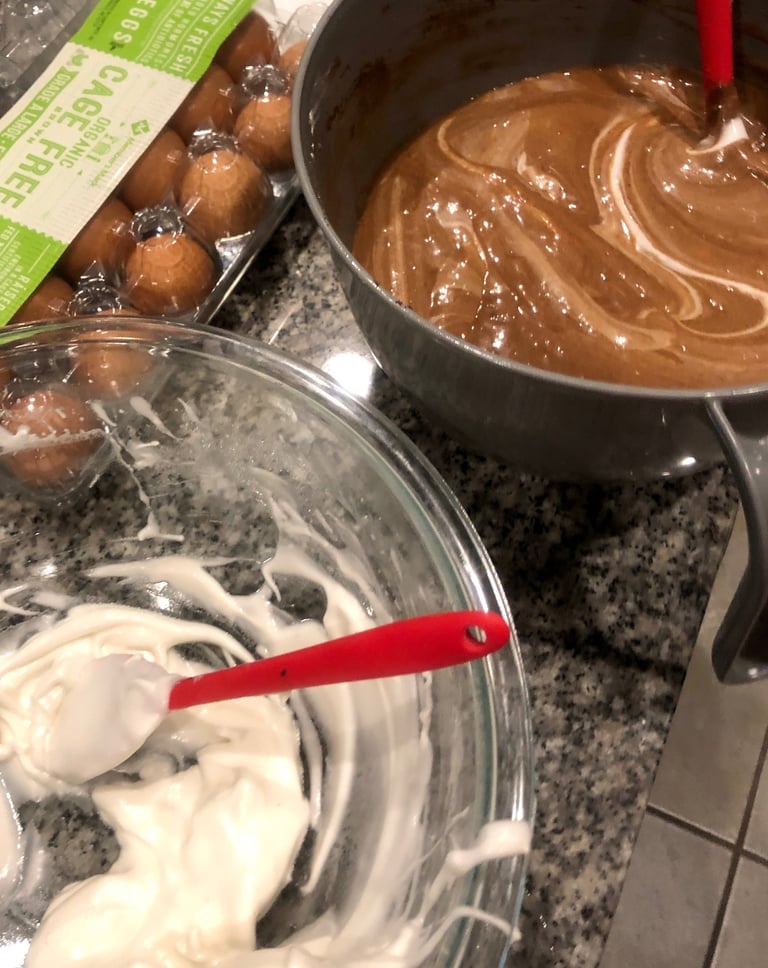
In another bowl (preferably glass as it’s the best choice when whipping egg whites), place your egg whites and lemon juice and preferably with an electric mixer start on low speed and whip until they become frothy
Once the egg whites are frothy, add a 1/3 of the remaining 1/2 cup of sugar and whip in one direction till the bubbles turn uniform (You may turn up the speed to a low medium but no more or your meringue will break)
Add another 1/3 of the sugar and whip until the bubbles turn small and get slightly thicker
Add the remaining amount of sugar and whip until the meringue turns glossy, smooth, and shiny like a pearl
Little by little bit, add this mixture into your base chocolate cake batter (Don’t be alarmed if there are air pockets when you return, it is the baking powder in action! A good sign!)
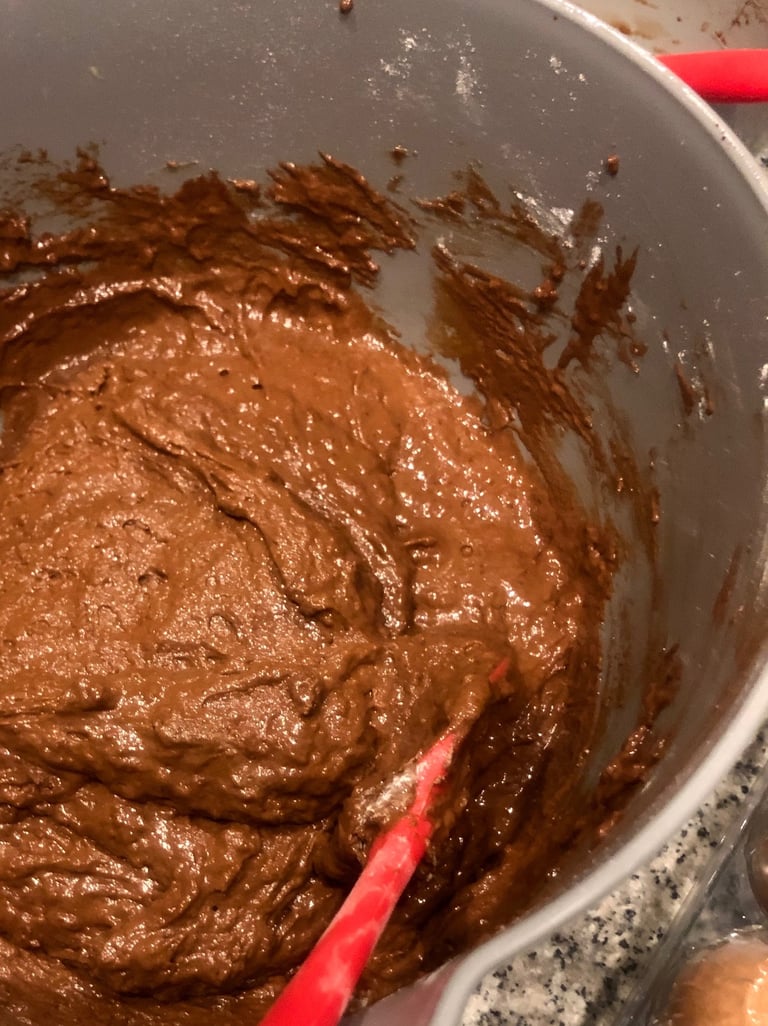
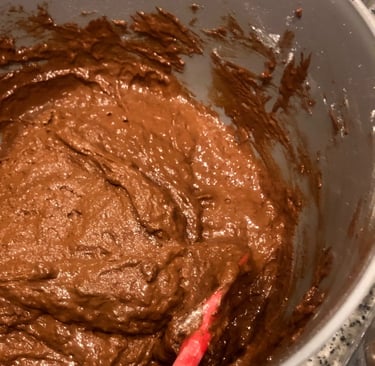
The thick batter should now turn from the texture of thick mud to smooth lava! Don’t forget to scrap the bottom as much as the sides
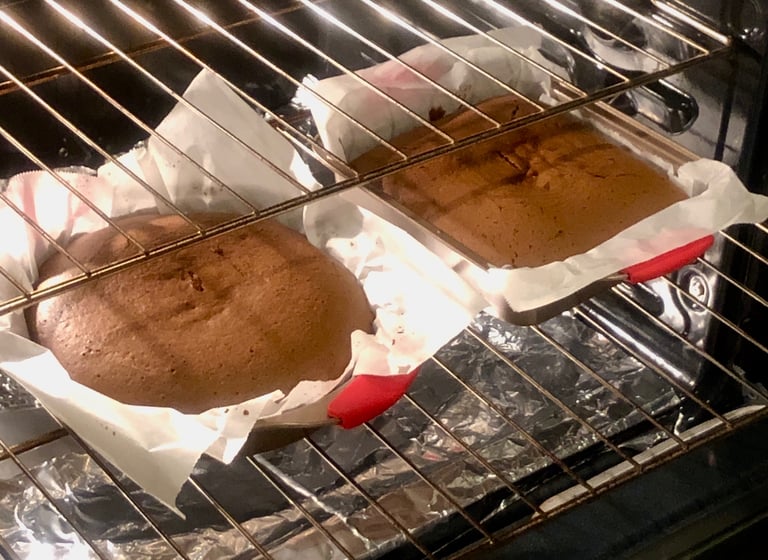
By now, your oven should be preheated to 350 degrees
Separate the batter between the two pans if necessary
Before baking, bang on the countertop three to five times to release any excess bubbles
Bake for 45 to 55 minutes or until a knife/toothpick comes out clean, rotating the pans halfway through
Cool and serve with any of the following toppings or your own choice! (Make sure your cake is cooled completely before you do so!)
Whipped Cream - The Easiest
Simply whip 2 cups of heavy cream, powdered sugar, and vanilla to taste
Be careful not to overwhip or it’ll result in butter!
Spread on top and serve extra on the side if desired
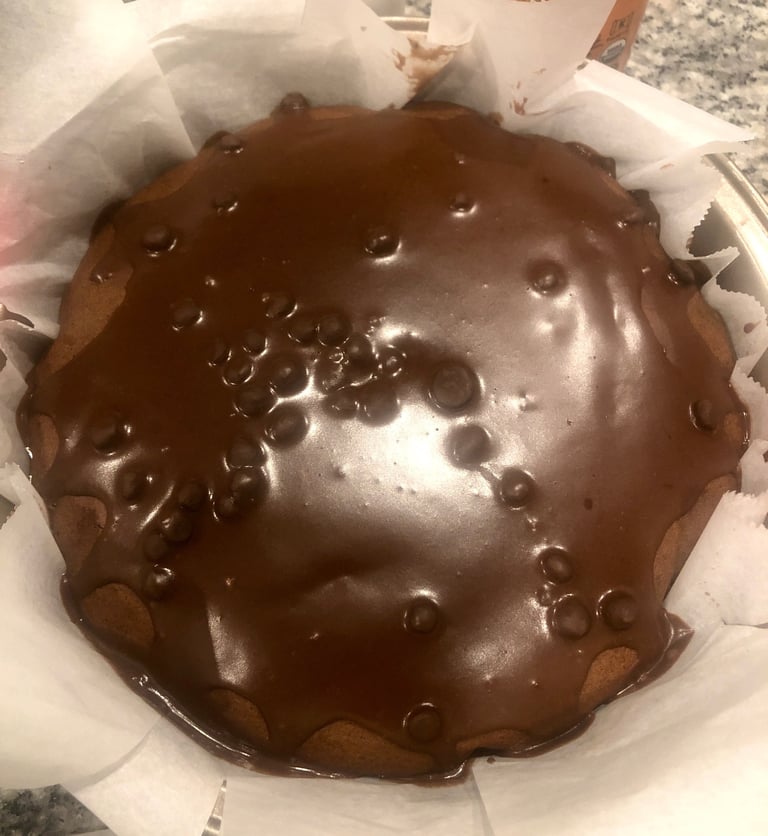
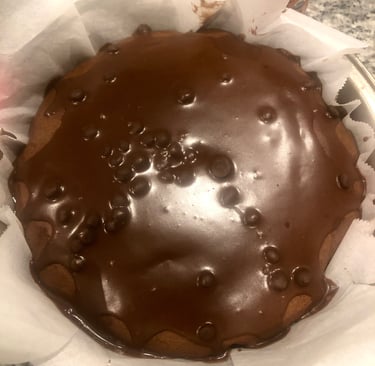
Chocolate Glaze - For My Art Tutor
Simply melt 1 cup of chocolate (heating in 10 seconds intervals and stirring each time so it doesn’t burn!), add ¼ cup of coffee, ¼ cup of milk/heavy cream, a pinch of salt, and vanilla to make a second chocolate potion
Add enough powdered sugar to sweeten and thicken
Spread on top and serve extra on the side if desired
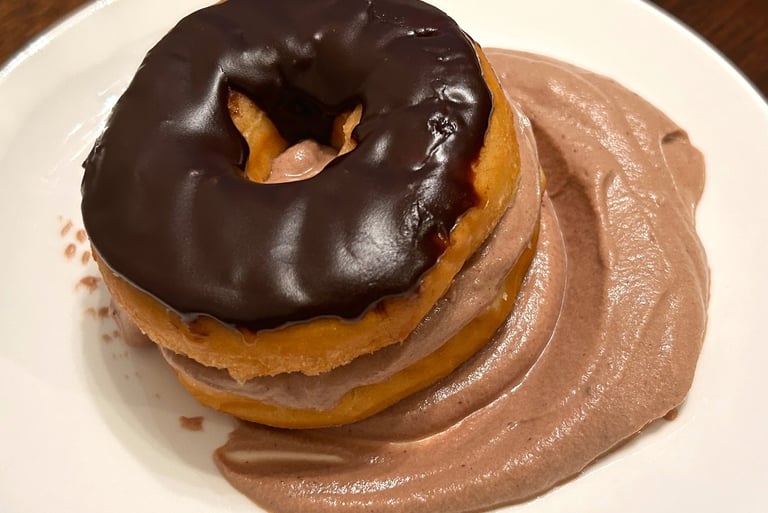
Cheat Chocolate Mousse
Click Here for the recipe! ^^
Spread on top and serve extra on the side if desired
I also recommend adding fresh raspberries! :)
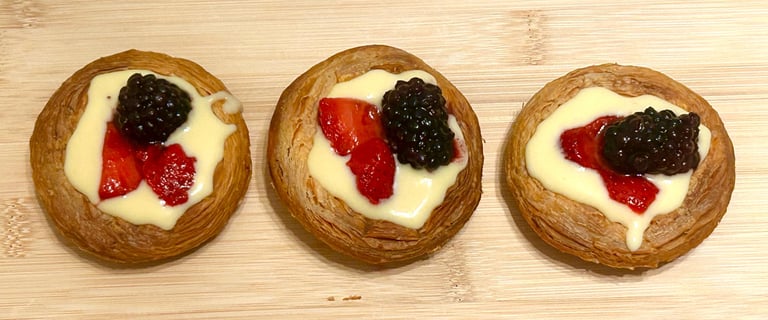
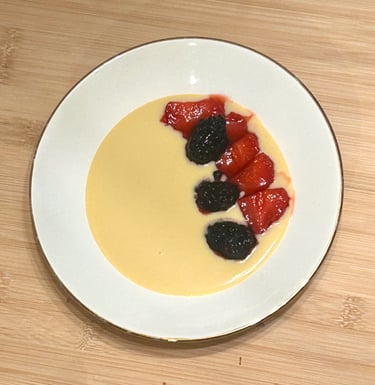
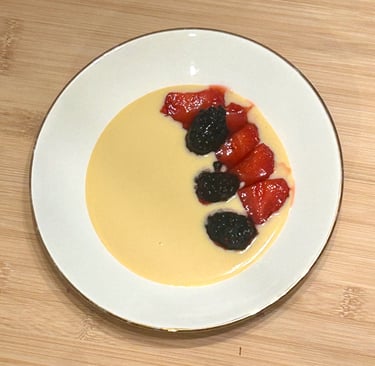
Pudding (or Custard)
This is another favorite of mine to make. I almost like to make this as much as I like making ice cream. When I’m in the hurry to make a quick dessert for guests that is as luxurious, I make this. During a summer dinner, make this before you work on appetizers and main courses so it can chill and thicken. In the winter, serve warm for a cozy finish to the meal. For an elevated approach, serve with fresh berries and cookies. You may even make it “fluffy” by folding homemade whipped cream into your cooled pudding upon serving. (Homemade whipped cream: Whip together 1 cup of heavy cream, powdered sugar, and vanilla to taste!) However, my favorite is putting them in puff pastry tart shells to make fruit tarts! ^^
Ingredients
¼ to ½ cup of cornstarch
5 egg yolks
1/8 teaspoon of salt
2 cups of milk or heavy cream (If you want something more decadent)
Sugar to taste (I recommend about ½ a cup which is plenty)
Directions
In a bowl, mix your egg yolks, cornstarch, and salt until combined. Make sure all the cornstarch is incorporated. (No need to get out your hand mixer as this will be already a mess as it is)
In a medium pot, heat up your milk or heavy cream
When it’s almost hot, add your sugar and dissolve (Most recipes encourage adding the sugar into the egg yolks, but I add it here because you can taste the milk, ensuring it’s as sweet as you like it.)
When the milk/cream becomes hot, add into your egg yolk mixture little by little
Do not be alarmed if it becomes too thin. Once combined, pour back into the pot and turn on to a low medium (The mixture should first look like yellow milk not scrambled eggs)
On low medium heat, continuously stir until your pudding becomes thick (You can tell when it starts to get thick when the bottom of your whisk catches the cornstarch mixed with egg yolks. That gets thick first!)
Once it gets slightly thickened, you can move the pot on and off the heat to ensure the pudding doesn’t get too hot
Once thickened, remove from the heat immediately (You may also adjust thinness with more milk/heavy cream)
If your custard curdles, add cold milk/cream and quickly whisk till it comes together again
Adjust sweetness if needed and add vanilla
Serve warm or chill in the fridge to serve later (Note: Your pudding will thicken in the fridge!)
I also recommend serving with fresh fruit like berries! ^^
Other variations or flavors are below!
Chocolate - My Cousin's Favorite
When mixing your eggs with cornstarch, add 3 tablespoons of cocoa powder (You may have to add more sugar to take out the bitterness of cocoa!)
When your pudding gets thick, add 1 cup of melted chocolate (heating in 10 seconds intervals and stirring each time so it doesn’t burn!), add ¼ cup of coffee, ¼ cup of milk/heavy cream, a pinch of salt, and vanilla
Serve warm or chill in the fridge to serve later
Berries (Strawberries, Blueberries)
Cook one cup of your choice of berries with sugar as needed, lemon juice, a little bit of salt till it becomes like a compote (Depending how much patience you have this can take up to an hour or a bit longer)
You can also put the above heated mixture (when the fruit gets somewhat soft) in a bread machine and choose the jam option to be more hands off!
Once this is cooled, add to your egg yolks, cornstarch, and salt (But add two more egg yolks and two more tablespoons of cornstarch to the original recipe!)
Resume the recipe as usual! ^^
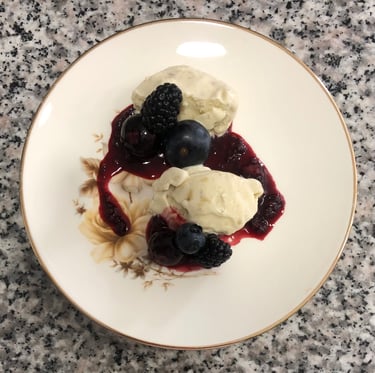
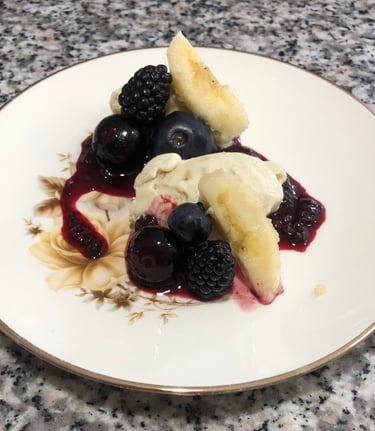
Ice Cream
This is the most exciting recipe I ever posted so far as it is my signature dish. :) Ice cream has always been one of my favorite dessert and I was spoiled with it. From Ben and Jerry's to Haagen Das, there was nothing like a tub of ice cream. It was bought at every special occasion and the perfect midnight snack. When I moved to Sarasota during my Junior Year, it was also the year I was first entered the kitchen for real. For the first time, I felt confident in cooking and I begged my mom to attempt making Nigella Lawson's Strawberry Ice Cream! The results looking back weren't picture perfect and I have perfected since then after more research (for about two years)! ^^ Homemade ice cream as Nigella puts it, isn't hard at all. Loosely paraphrased from her, it's just the question of heating and mixing. This has been my favorite to make for guests (and for me - not trying to be selfish) because it's easily impressive and can be stored for months...that is, if you have any leftover! XD My warning in advance? It's not very healthy, haha. This makes two churns so feel free to half the recipe if you need to. BUT I always go the whole hog because you can never have too much ice cream. :)
Ingredients
1,500 milliliters of heavy cream
220 milliliters of whole milk
15 large egg yolks (or 17 if the eggs are small!)
180 grams of Sugar (Brown or White works fine!)
Vanilla extract, to taste
1/8 teaspoon of salt
Lemon juice (The secret ingredient! This brightens flavors. Add about a 1/2 teaspoon.)
Directions
First things first - DO NOT FORGET to PLACE YOUR ICE CREAM CHURNER IN THE FREEZER! You want it to be frozen cold.
Separate the egg yolks from the egg whites, we will only be using the yolks for this recipe! Egg whites are great for pancakes! ^^
Using preferably an electric mixer, beat the egg yolks, sugar, and salt until the yolks turn pale yellow and similar to the thickness of mayonnaise. Do not worry about scraping the edge of the bowl!


Heat milk and cream in a pot till it’s hot but not boiling. You will know when the milk and cream are hot when the cream begins to detach from the pot.
Slowly, little bit by little bit, add the hot cream to the egg mixture. Taking it slow to avoid your mixture turning into scrambled eggs.
Once the two are united, pour back into the pan and heat for a couple more minutes…ensuring that the eggs are cooked.
When heated, pour back into the bowl and add your vanilla (Always add extracts at the end so the flavor doesn’t cook out before then!)
Add lemon juice to accentuate flavors
Let the mixture cool on the countertop before allowing it to cool completely in the fridge, overnight is best.
When you’re ready to churn, place the tub into the churn and turn it on :), this allows the ice cream to churn right away - better results!
Taste your mixture one more time and adjust if needed
Pour your ice cream mixture, DO NOT OVERFILL! 2/3 of the way is plenty.
Churn for 20-40 minutes till thickened like soft serve
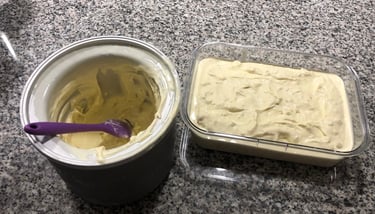
Don’t be alarmed if it’s not thick enough! Transfer into your desired “ice cream container” and freeze for a couple hours (Avoid using a metal spoon because it’ll ruin your churn.)
To serve, take out a few minutes before serving to allow ice cream to soften enough to scoop and enjoy! ^^
Feel free to experiment with other flavors below, too! ^^

Chocolate
Beat the eggs like normal with the sugar and salt, however, feel free to cut the amount of sugar in half especially if your chocolate is very sweet haha (I use 85 grams and if I need to, I add a little powdered sugar at the end thinned with milk just to sweeten a bit. Only if I need to, haha.)
However, when heating up the cream and milk, add your cocoa powder too so the flavors can intensify as the cream warms up
Proceed the rest of the recipe as usual except when the ice cream mixture is warmed up for the last time, make a chocolate potion (1 cup of melted semi-sweet chocolate chips, 1/4 cup of milk, 1/4 cup of coffee) and pour the finished, hot ice cream base into the potion.
We mix the melted chocolate at the end to avoid burning
Lemon juice is not very necessary for this distinct recipe!
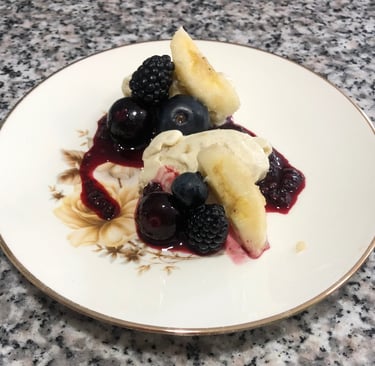
Berries (Strawberries, Blueberries)/Stone Fruit (Peaches)
This is probably the most laborious of flavors but it’s so worth it! Cook your berries or stone fruit down till it becomes like a jam, removing all the water that can dilute the flavor of your ice cream. Add sugar as needed, lemon juice, and a wee bit of salt. For peach ice cream, I enjoy adding a touch of cinnamon and ginger powder. Don’t forget the vanilla. You may add other spices of your choice. This can take up to 45 minutes to an hour.
If you don’t want to slave away, feel free to place fruit in a bread machine as soon as the fruits are so decently soft. Make sure to keep an eye on it so it doesn’t burn.
Allow it to cool and beat this into your egg yolk mixture after it has turned into a pale mayonnaise color and then proceed the recipe as normal!
It is essential in fruit ice creams to add the lemon juice as it really allows the flavor to jump out!
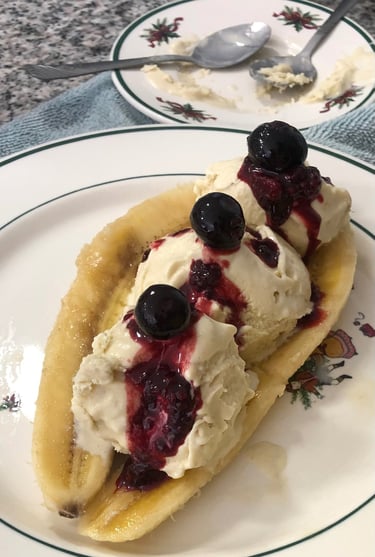
Banana
This is the most unique and economical. It’s not as laborious as the usual fruit ice creams and it’s also something different!
Simply add two mashed bananas into your egg yolk mixture after it has turned into a pale mayonnaise color and then follow the recipe as normal! Be sure to stir so the bananas don’t burn.
Once your ice cream base is finished and is still hot, chop up another banana for extra measure! Be sure to give your mixture one last mix before you churn so you don’t get huge chunks in weird places.
It is essential in fruit ice creams to add the lemon juice as it really allows the flavor to jump out!
Mango
This one is tricky as mango isn’t very prominent of a flavor
Puree five mangos with a bit of milk and add to your finished ice cream base
It is essential in fruit ice creams to add the lemon juice as it really allows the flavor to jump out!
Chill and churn and you’re ready to enjoy!
Matcha/Green Tea
When heating up your cream and milk, add 3-6 packets of matcha powder to bloom the flavors before adding to the egg yolk mixture
Then, proceed like normal and enjoy!
Lemon juice would be great in this instance. :) Also, please note that you may or may not need to add more sugar!
Coconut
When heating up your cream and milk, reduce 50-70 millimeters of milk to ensure the result will be creamy as normal ice cream
Then, proceed to make ice cream as normal
While the ice cream base is still hot, blend two cups of young coconut meat with its juice and mix into the mixture
Chill overnight and add two additional cups of coconut water before churning and enjoy! ^^
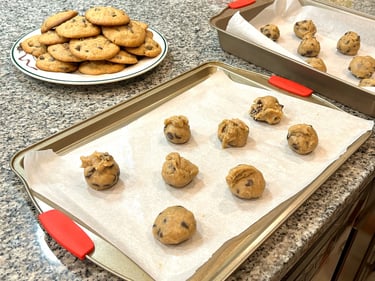
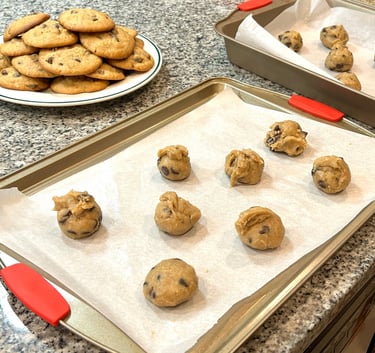
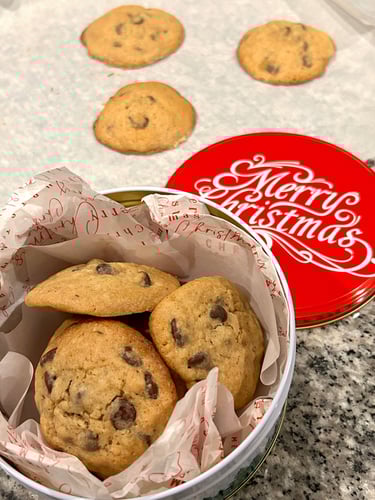
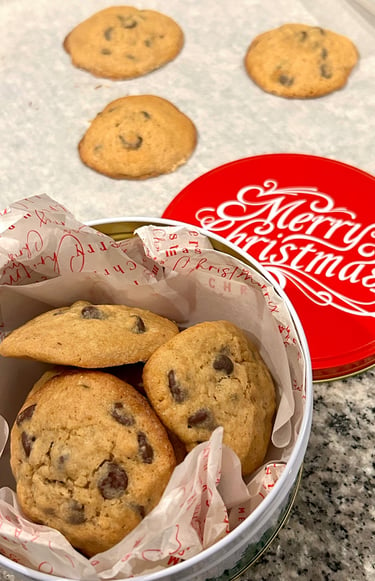
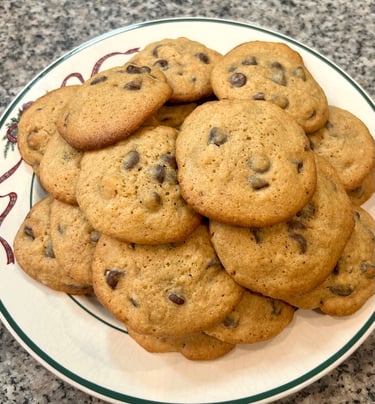
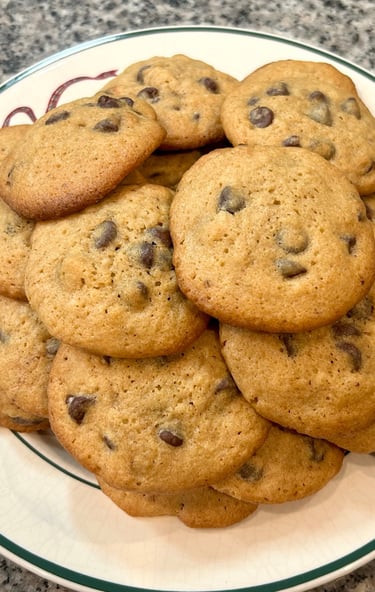
Chocolate Chip Cookies
We’re starting a new Christmas tradition in my house and that is making cookies, starting with the classic chocolate chip cookie. I’ll be honest, I’m not quite a cookie person but these cookies are so good! It ruined every other chocolate chip cookies, at least for me now. This recipe however was a mashup between two of my favorite bakers on the internet: Bake with Zoha and Sugar Spun Run. ^^ (You may check their websites to see why this will be delicious and why each step is crucial) You can totally double, maybe even triple this recipe. I doubled my batch for my professors on Christmas and still ended up with extra. One batch makes about 12 cookies, but if you make the balls smaller, you might squeeze in extra. (wink wink)
Ingredients
10 Tablespoons of unsalted butter (140 grams)
½ cup of white sugar (100 grams)
¼ cup of maple syrup (Doesn’t need to be the expensive brand)
1 large egg + 1 egg yolk
A splash of vanilla
1 Teaspoons of coffee/instant coffee dissolved in hot water
1 1/3 cup of all-purpose flour
½ Teaspoons of salt
1 ¼ Teaspoons baking powder
2 Teaspoons of cornstarch
450 grams of Chocolate (Chips work great to me but some prefer chopped bars of chocolate as they create more “pools” of chocolate. It’s up to you!)
Directions
Measure the butter, sugar, and maple syrup – don’t worry about anything else for now
Brown the butter at low heat (Beware that the butter will burn really fast so turn down the heat lower right away the second the butter stops bubbling rapidly and turns brown)
Add sugar and cook on low heat for 2 minutes; do not worry about melting the sugar. It’s all about getting it almost caramelized for flavor. Bake with Zoha explains this better than I do. ^^ (If you’re making more than one batch, double the cooking time or continue cooking at your own judgement. Be careful that you don’t get too much sugar crystals on the sides of your pan!)
Pour in maple syrup and vanilla to cool down the sugar (Curious about the maple syrup? Check out Sugar Spun Run's recipe!)
Stir till combined, take off the heat, and set aside to cool further
Measure the remaining ingredients
In a small bowl, mix the measured flour, salt, baking powder, cornstarch, and chocolate together, and set aside for later
By now, your brown butter mixture should be mildly warm but not hot
Whisk in the cooled coffee (You won't taste it!) and eggs to turn the lumpy sugar to smooth and silky!
Pour in the chocolate mixture and stir/fold till all just combined (Try not to overmix!)
Chill the dough for at least 3 hours though overnight is best
When you’re ready to bake, preheat the oven to 375 degrees
Line a baking pan with parchment paper and grease with butter
Drop balls of cookie dough, about 1-2 tablespoons each on the pan making sure to leave space in between as the cookies will spread
Bake for 10-15 minutes depending on how chewy or crispy you want your cookies to be (Careful not to burn the chocolate), I found mine to be perfect around 12-15 minutes. It’s roughly when the edges of the cookies all change to a light brown color
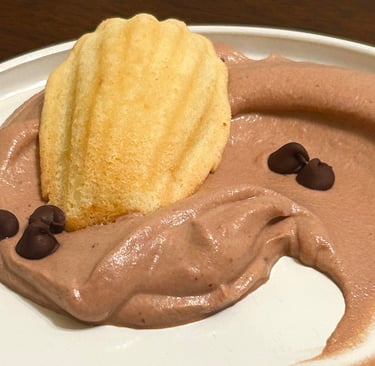
Cheat Chocolate Mousse
Incredibly easy, only takes a handful of ingredients, and multi-purpose: Serve as is or spread over chocolate cake as a replacement for icing.
Ingredients
2 cups of heavy cream
1 cup of chocolate (Chips, chocolate bar, doesn't matter. Milk, dark, white, combination - up to you! I just wouldn't do any fruit flavored chocolates here...)
1/4 cup of milk (You can use more heavy cream here but personally; this is already quite rich as it is!)
1/4 cup of coffee (This accentuates the flavors of chocolate. If you're worried about caffeine or you don't have any coffee, just add another 1/4 cup of milk/cream! Do not add coffee if you're doing white chocolate...though, it could give you coffee flavored mouse if that's what you want!)
Vanilla (Optional)
Powdered sugar (Depending on how sweet you want your mouse, you may/may not need this!)
Directions
Place chocolate chips into a microwave safe bowl
In the same bowl, pour in the 1/4 cup of milk/cream (NOT the 2 cups), 1/4 cup of coffee or extra milk/cream and give it a little mix to incorporate
Cover the bowl for safety and microwave for 30 seconds
Take it out and check to see if the chocolate has began to get soft by trying to stir it (Note: The chips may not look melted but you might be surprised as chocolate melts fast. DO NOT OVERHEAT or the chocolate will get grainy.)
If chips are still hard, cover again and microwave another 5-10 seconds until soft
Once chocolate chips are melted, mix it with the now hot liquid. Do not be alarmed if it seems like there is more liquid than chocolate. Keep mixing, the chocolate will thicken as it cools
While the mixture is cooling, get a separate bowl and pour in your 2 cups of heavy cream and a splash of vanilla (if you desire)
Whip the heavy cream and vanilla till soft peaks form. You can tell when the beaters start making thick trials through the cream. DO NOT overdo this or you'll get butter!
Check the sweetness of your chocolate mixture. If it's not sweet enough, go ahead and add powdered sugar.
The mixture should be thin like a runny egg yolk. If it's still too thin, you can add some powdered sugar to thicken it.
Once you're happy with it, pour the melted chocolate into the heavy cream mixture.
Take a spatula and fold it into the heavy cream. Don't forget the bottom!
Fold till chocolate and cream have combined to a unified brown cloud!
Serve as is with fresh fruit or top it on top of chocolate cake.